This section of the Research AMP documentation shows how you can customize the behavior and appearance of your site.
First Steps in Customizing Your Research AMP
Setting the title of your Research AMP
Once installed, the first thing you will likely want to do is set the title of your Research AMP site. Go to Settings > General Settings and set your site title and a tagline.
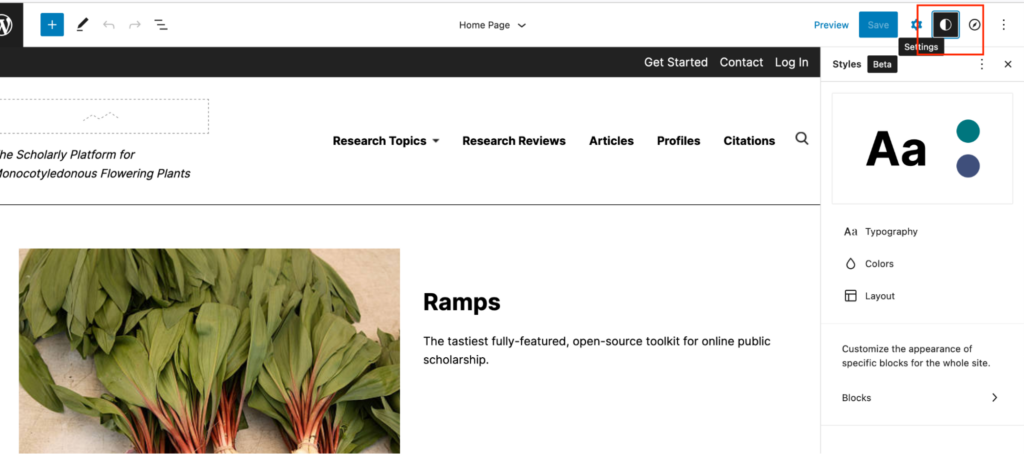
To change the logo, click on Appearance > Editor to open the Site Editor. Double click in the appropriate section to add a logo. You can also use tools in the Appearance section to change the fonts for the text and links, and to choose colors. Click on the “Styles” icon in the top right corner of the screen (outlined in red in the image below).
To return to the Dashboard from the Site Editor, click the upper left icon, and in the menu, click “Dashboard.”
“About” and other pages
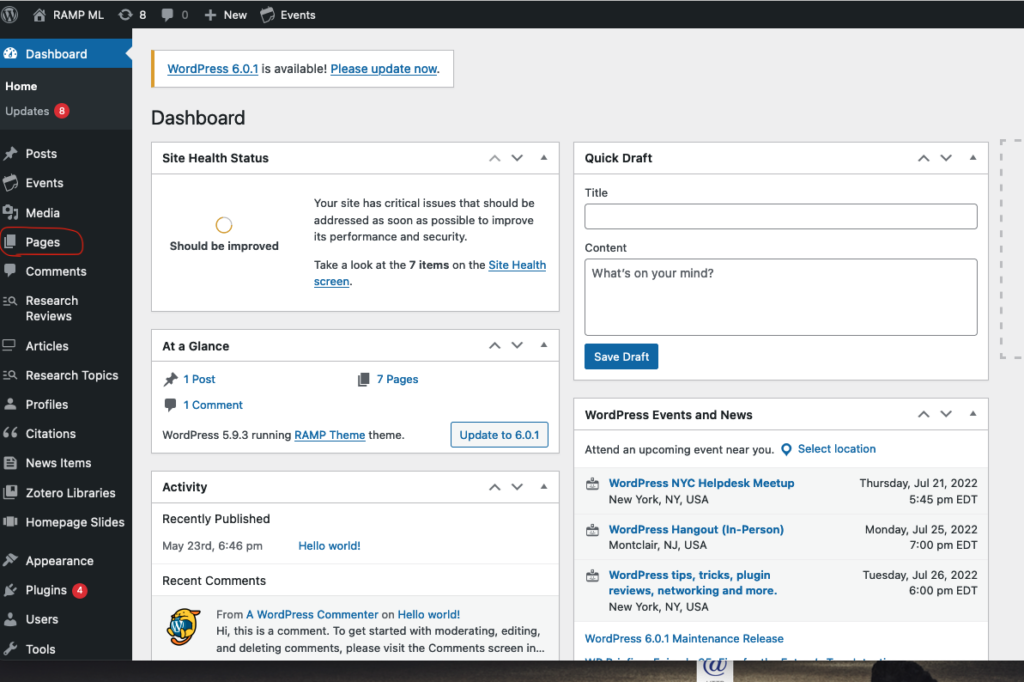
On installation, Research AMP will create a number of pages, which can be found at Dashboard > Pages (Outlined in red in the image below).
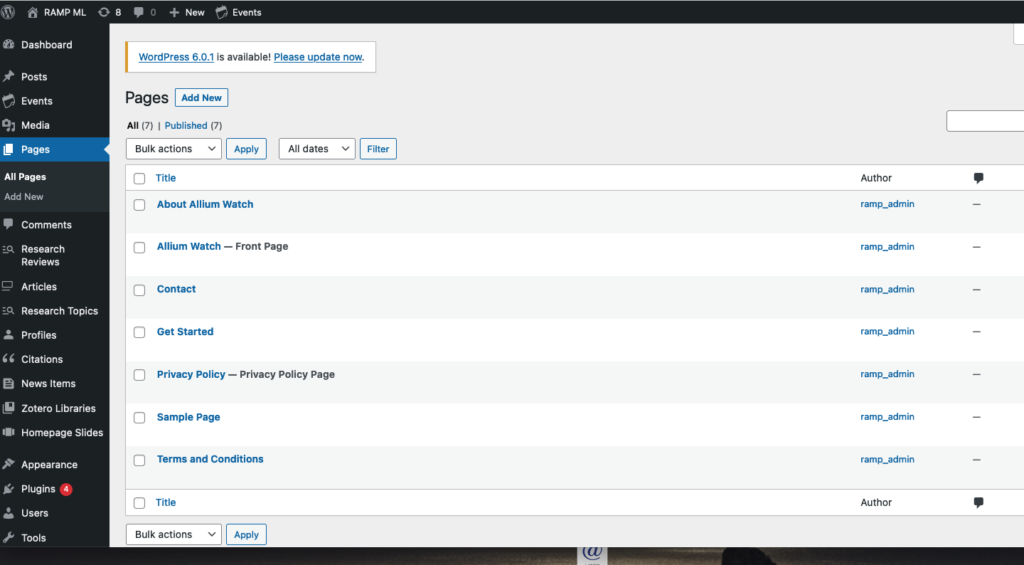
A number of these pages are required for the display of important pieces of Research AMP content. You may change the name or URL of these pages, but do not delete them or change their ‘Page Template’ values. These crucial pages are:
- Home Page (powers the main landing page)
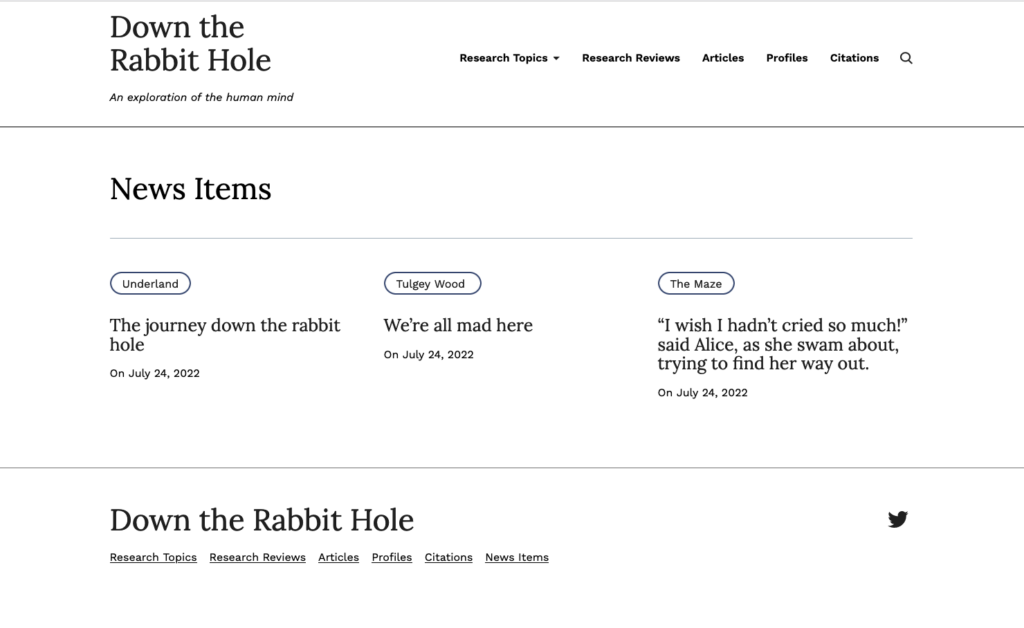
- News Items (powers the News Items directory listing)
Other pages are created as a convenience. Feel free to modify or delete these default pages as your project requires:
- Get Started
- About
- Contact
- Terms and Conditions
Home Page
The Home Page template controls the layout and appearance of the main site landing page. The Home Page populates with Teaser blocks as you add research reviews, scholar profiles, and other elements of the site. By default, the Home Page template includes “teaser” blocks for the Research AMP content types (Research Topics, Research Reviews, Articles, and so on), as well as a “Call to Action.” Use the Site Editor tools to remove, reorder, or reconfigure any of these default blocks. You may also use the Site Editor tools to insert any other WordPress blocks.
The Home Page template is designed to be mostly ready to use upon installation; Teaser blocks will be automatically populated as you create content on your site. However, there are a few sections which require manual configuration prior to your site’s launch:
- The Home Page Slides block will be empty until you have created one or more items at Dashboard > Homepage Slides. See the documentation on Homepage Slides below for more information.
- The Call to Action section is populated with some default text (“Get involved in our project…”). Edit this section in Dashboard > Appearance > Editor to fit your project’s needs, or remove it.
- The Article Teasers block is configured by default to use the ‘Featured’ layout, which shows a featured article in the left-hand column. Once you have created one or more Articles, use the Article Teasers block’s configuration tools to set the home page’s Featured Article; or change the layout to the ‘List’ or ‘Grid’ layouts, which don’t require a Featured Article to be set. See the documentation on the Article Teasers block below for more information.
Navigation
The Research AMP theme has a number of navigation areas, designed to help users navigate your site:
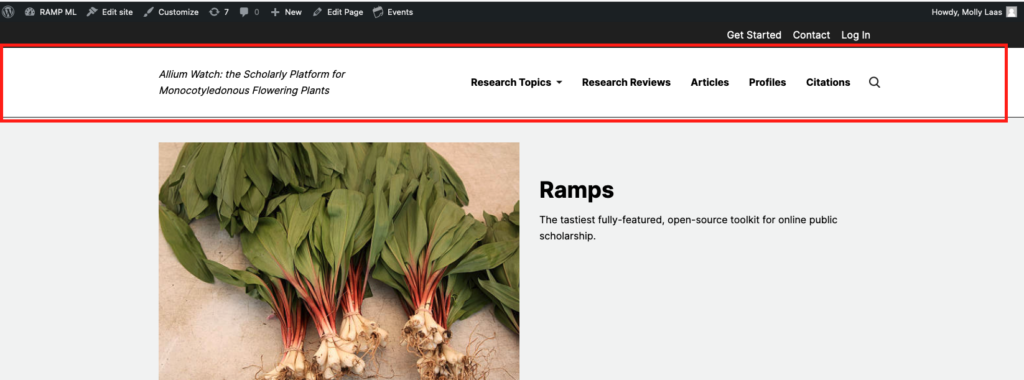
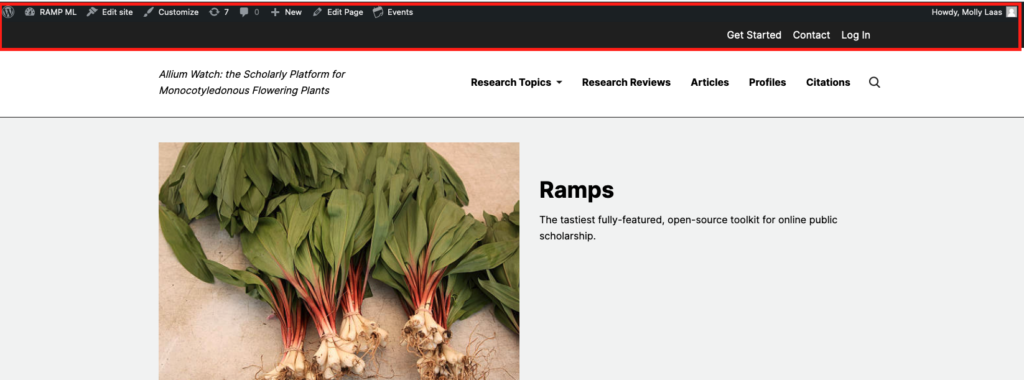
- Primary Navigation, (outlined in red in the image below) which appears alongside the logo in the default configuration. At the time of installation, Research AMP will create a number of default navigation items in this area, including a ‘Research Topics’ item that is automatically populated with a list of Research Topics as you create or edit them.
- Secondary Navigation, (outlined in red in the image below) which appears in a black bar at the top of the page. By default, this area contains links to ‘Get Started’, ‘Contact’, and the WordPress login page, as well as some quick links for editing the page, which you will see if you are logged in as an administrator of the site.
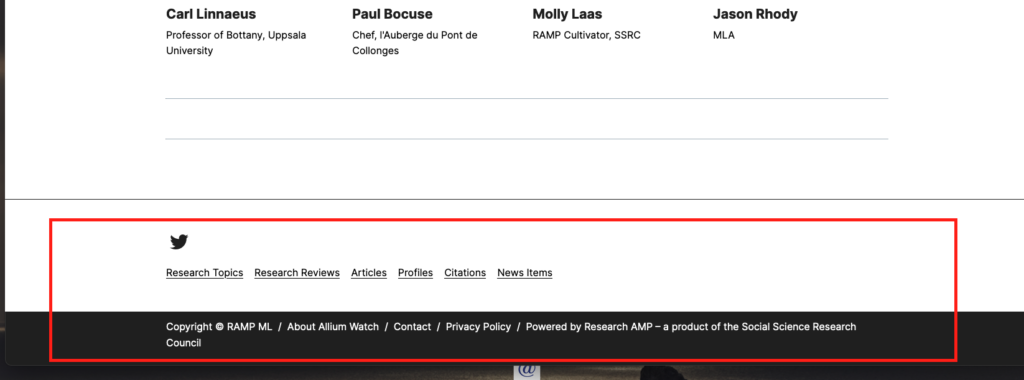
- Footer Navigation, (outlined in red in the image below) which appears in the site footer. By default, this contains a navigation structure similar to Primary Navigation, minus the ‘Research Topics dropdown.
The primary navigation, secondary navigation, and footer navigation can be edited via Dashboard > Appearance > Editor. See here for more information on creating and modifying Navigation elements in the Editor.
Site Editor
The Research AMP theme is a WordPress “block theme,” which means that its layout and style can be modified using the WordPress Site Editor. See here for more information on block themes.
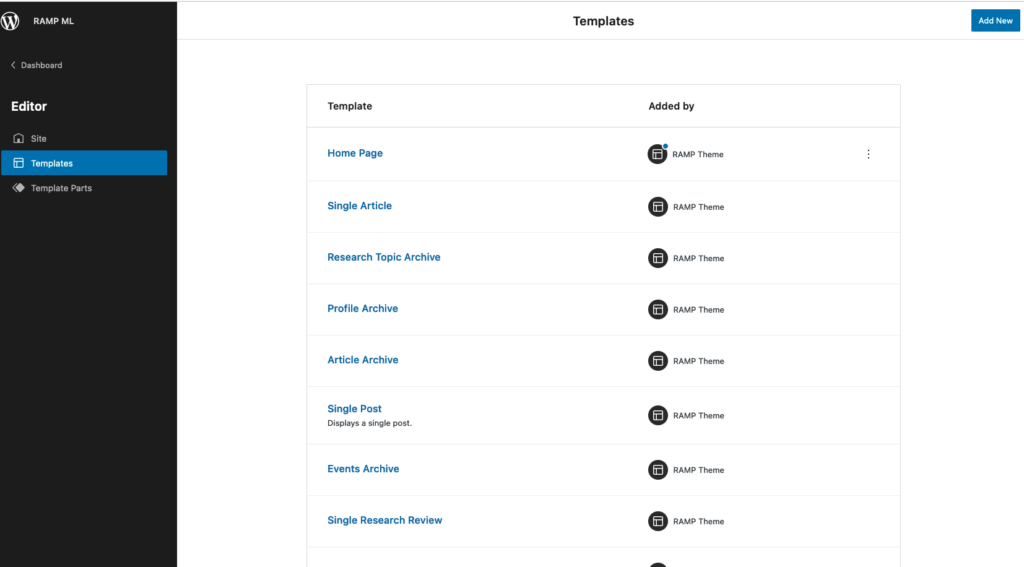
The Site Editor can be used to edit the Theme Templates in the Research AMP Theme, which dictate the arrangement and appearance of the various page types on your Research AMP Site. Visit Dashboard > Appearance > Editor to get started, and see here for more information on the Site Editor’s features.
The Research AMP Theme comes with several different types of Templates, which can be selected using the template navigator. Visit Dashboard > Appearance > Editor to get started, and see here for more information.
The templates provided by the Research AMP Theme includes:
- Research Reviews
- Articles
- Profiles
- Citations
- News Items
Templates
Archive Templates
Each content type used by Research AMP (Research Topics, Research Reviews, Articles, Profile, Posts [News Items], Citations, Events) has its own “Archive” template. The Archive templates dictate the layout of “directory” or “list” views, where users can browse a list of all Research Topics, Articles, and so forth. In the template navigator, look for “Research Topic Archive”, “Article Archive”, etc.
You can access the template navigator from the Dashboard by clicking Appearance > Editor, and then picking “Browse All Templates” in the drop-down menu at the top of the page.
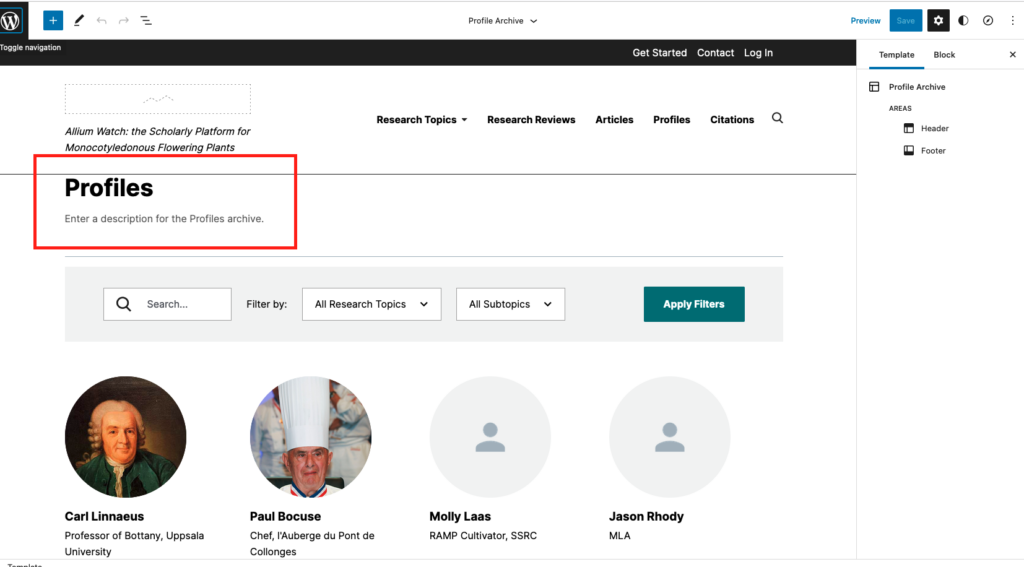
Each Archive template has a space for you to enter a description of the content type. In the Site Editor, look for placeholder text such as “Enter a description for the Profiles archive” and write a description to help your users understand that content type.
Research AMP’s Archive templates use the same Teaser blocks as the Home Page. See the documentation on Blocks for more information.
A number of Archive templates have special features that merit notice:
- Profile Archive has a “Profile Directory Filters” block, which powers the search and dropdown filters used to browse Profiles.
- Similarly, Citation Archive has a “Citation Directory Filters” block, which powers the directory’s search and dropdown filters.
- Event Archive provides integration with the third-party plugin The Events Calendar, which does not yet have full support for the Site Editor. As such, when you edit this template at Dashboard > Editor, you’ll see a block called “The Events Calendar,” with placeholder text “The interface for The Events Calendar will appear here.” When viewing the Events page on the site’s frontend, users will see a list of upcoming events. To add events, navigate to Events in the Dashboard, and click “Add New;” this will give you a series of fillable forms to add in details about the event.
Single Templates
Each content type has a “Single” template, which dictates the layout of individual items from that content type. This template needs to be applied to each new piece of content; for example, to create an article on the site with the standard template, you need to click “add new” in the articles section of the dashboard, open the gear icon, and then choose the “Single article” template.
When viewing a Single template, you may see “generic” content, such as ‘Post Title’ in the place of an actual post title. This is placeholder content that’s visible only when editing the template, and will be replaced by actual content when viewing an item on the frontend.
The Research AMP team has designed templates for each content type that should work well for most sites. You can access them in the right-hand toolbar: click the gear symbol. For example:
- “Single Research Topic” contains teasers for various content types associated with Research Topics
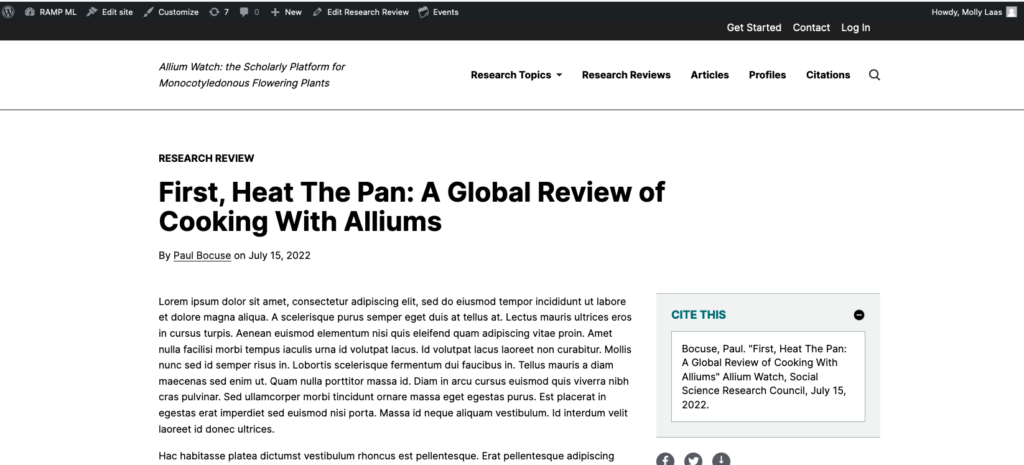
- “Single Research Review” has a two-column view, with item content on the left, and a right-hand sidebar containing a Table of Contents, Cite This, and social sharing buttons
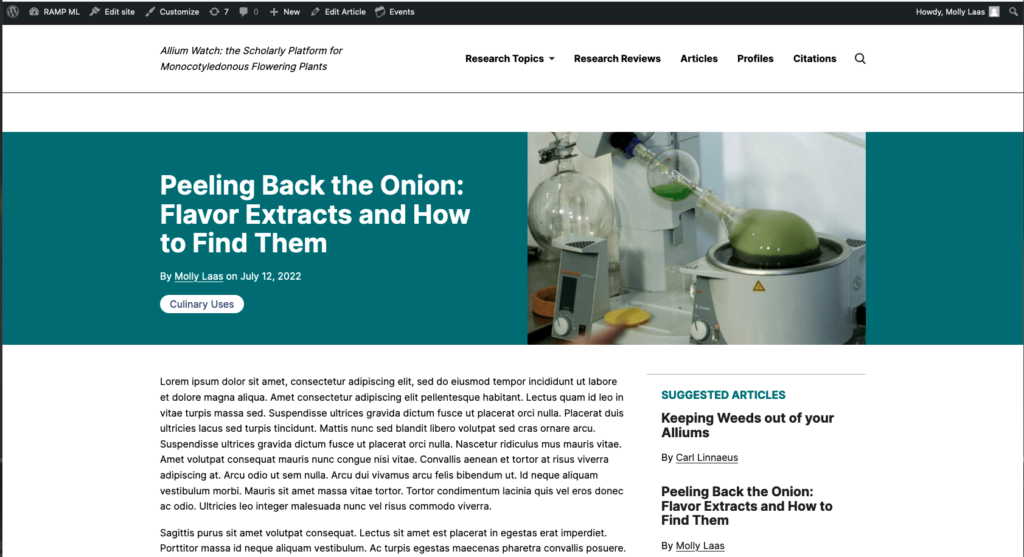
- “Single Post,” which powers individual News Items, has a sidebar containing links to Suggested News Items
You may customize these templates to better suit the needs of your Research AMP site.
Blocks
Research AMP provides a number of blocks, which can be used to display pieces of Research AMP content throughout your site. For an introduction to the WordPress block system, click here.
Find a Research AMP block by typing its name into the Block Inserter, or begin typing “Research AMP” to see a list of blocks in the Research AMP category. See here for more information on the Block Inserter.
Many of the blocks you might want to use are already pre-populated into the templates. For example, if you’d like to quickly create a Research Review with the standard features, choose a template rather than adding in the individual features as blocks.
What follows is a description of the primary block types provided by Research AMP.
Teaser Blocks
For each content type (Articles, Research Topics, Profiles, etc), Research AMP provides a Teaser block (Article Teasers, Research Topic Teasers, Profile Teasers, etc). Teaser blocks offer a summary of items in a given type, and are useful wherever you want to “tease” content of that type. For example, the default template for single Profiles has an Article Teasers block, a Research Teasers block, and an Events Teasers block, all of which are configured to show the most recent handful of items associated with the current profile: the block will automatically populate when the profile is associated with other content on your site.
Each Teaser block has a slightly different set of settings, depending on how the content type functions inside of a Research AMP site. Despite these differences, most Teaser blocks have one or more of the following settings panels. (More information about Block Settings can be found here.)
Content Settings
Use this setting to specify how it will be determined which items appear in the Teaser block:
- Relevant: When set to “Relevant”, the block will show items that are relevant for the current page context. For example, a Research Review Teasers block set to “Relevant”, in the context of a single Research Topic page, will show Research Reviews that are associated with the given Research Topic.
- All: When set to “All”, the block will pull from all items of the given type, regardless of page context.
- Advanced: Use the “Advanced” setting when you want to show items associated with a particular Profile or Research Topic that you can specify.
Order and Pagination
The Order setting gives you control over which items are shown in the block.
- Alphabetical: Items will be shown in ascending alphabetical order. Useful for directories.
- Recently Added: The most recently created items will be shown, in reverse-chronological order.
- Random: Each time the block is loaded, a different, randomly selected set of items will be shown.
The Pagination setting controls how many items are shown in the teaser. When the ‘Load More’ toggle is turned on, a button will appear when there are more items to show; when clicked, the next batch of items will be loaded onto the page.
Display Options
“Show publication date?” lets you control whether an item’s byline will also include the publication date.
When turned on, “Swipe on mobile?” allows the teasers to be swiped horizontally on mobile devices.
Layout Tools
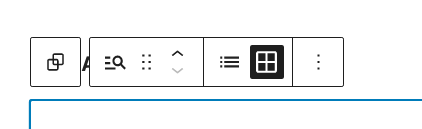
Most Teaser blocks support multiple Layout options. Layout is controlled with buttons on the block toolbar, which is visible when the block is selected in the editor:
- List: Items are presented in a vertical column.
- Grid: Items are presented in a grid, typically 3- or 4-columns wide on desktop, and adapting as appropriate on narrower screens.
- Featured: Available on the Article Teasers block, the Featured layout has a single ‘Featured Article’ slot in the left-hand column, and three stacked non-featured Articles in the right-hand column.
Item Information Blocks
Research AMP includes a number of blocks that are compatible with multiple item types (Article, Research Review, etc), and dynamically display information about the current item:
- Item Byline: Builds a byline for the current item, based on the Profiles that are associated with the item. You must create a profile for the author in order to assign an article to this person. Has a toggle for including the item’s publication date.
- Item Research Topics: Displays links to Research Topics associated with the current item.
- Item Type Label: Used by default above the title of individual items, the Item Type Label indicates the type of item you’re currently viewing. In the case of Articles, this corresponds to the current Article Type (Video, Interview, etc). In the case of other item types, it’s simply the item type itself (Research Review, Citation, etc).
Profile Blocks
See the Curation > Profiles section for more information on Profile-specific blocks.
Zotero Libraries
Your Research AMP site can connect to one or more Zotero libraries. When a Zotero library is linked to a Research AMP site, entries in your Zotero library will be synced periodically to the Research AMP site as Citations, which can be browsed via the Citation Library.
Managing Libraries
Visit Dashboard > Zotero Libraries to see a list of linked Zotero libraries. Click ‘Add New’ to link a new linked library.
Fill in the ‘Library Settings’ fields to get started:
- Library Name is the name that will be displayed on Citations to indicate which Zotero library the Citation comes from.
- Library ID is the unique identifier for your Zotero library. In the case of group libraries, the ID will be of the form “groups/1234567”, and can be found as part of the URL of the library on zotero.org. In the case of individual user libraries, the ID will be of the form “users/xxxxxx”, where “xxxxxx” is your numeric user ID, which can be found on your API Keys page. See here for more information.
- API Key is a string, akin to a password, that allows your Research AMP site to communicate with Zotero. To generate an API key, click here and follow the instructions there. Copy the API key and paste into the ‘API Key’ field carefully; zotero.org will only show you the secret key one time.
Click ‘Publish’ to save your new library.
The next time you load the Zotero Library page, you will see an error notice if Research AMP was not able to connect to your library using the Library ID and API Key you provided. If you see this error notice, check your Zotero credentials and re-enter them.
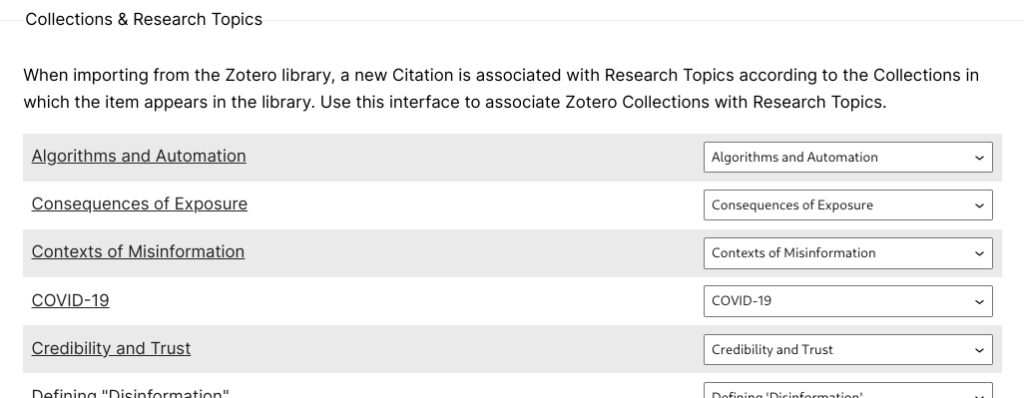
When the Zotero Library administrative page loads, it will attempt to fetch a list of the collections in your Zotero library. In order for Zotero items to be correctly imported, each collection in this list must be associated with a Research Topic. You will need to make sure that your Zotero library is organized with each piece of content in a folder with the same name as your research topic, so that it imports correctly.
Library Sync
When you link a Zotero Library to your Research AMP site for the first time, Research AMP will schedule a daily sync routine. During this sync routine, your WordPress site will communicate with the Zotero server to fetch library items and convert them into Research AMP Citations.
The Sync section of the Zotero Library edit panel shows when the last sync took place, as well as when the next sync is scheduled. You may also use the ‘Trigger Zotero sync’ button to trigger an immediate sync. Note that a full library sync may take a few minutes to complete.
It is a good idea to make a backup of your citation library on an external hard drive, just in case of problems while synching.
Content and Curation
Once your Research AMP site is configured, you’re ready to begin creating and curating content. When managing content on Research AMP, you’ll have access to all the content-editing tools of WordPress. See https://wordpress.org/support/article/wordpress-editor/ for more information on WordPress’s editorial toolkit.
In addition to the default WordPress tools, some Research AMP item types have type-specific affordances and requirements.
Research Topics
Research Topics are the most central way to organize content on a Research AMP site.
Create and manage Research Topics at Dashboard > Research Topics.
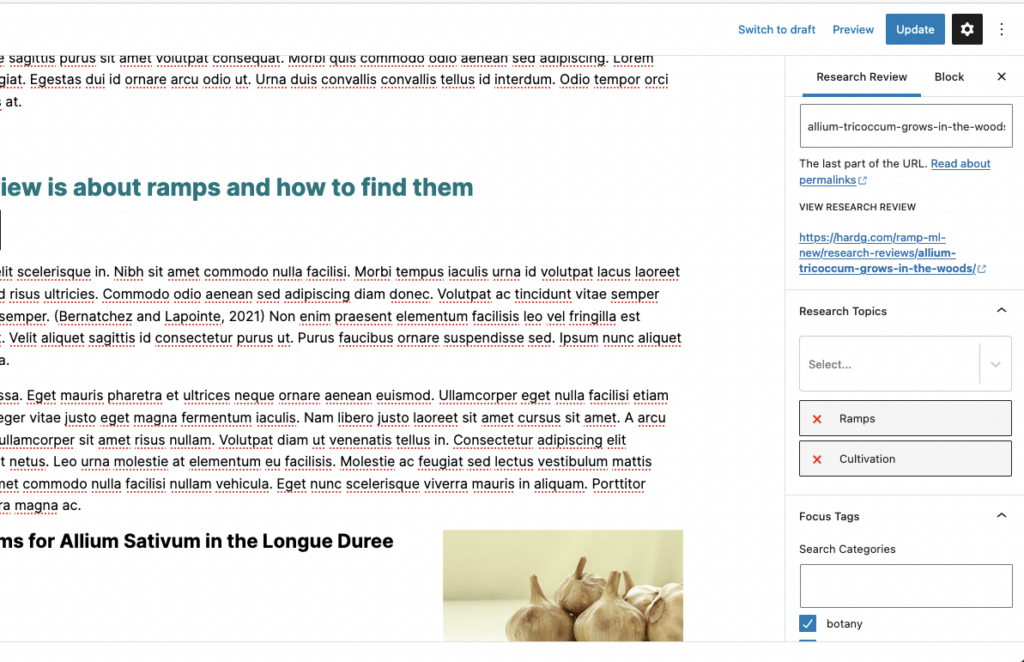
Most Research AMP content types (Articles, Citations, etc) can be associated with one or more Research Topics. For example, when editing an Article, find the Research Topics section in the Article sidebar. Each piece of content can be assigned to one or more research topics in the right toolbar. This is also where you would add tags, assign the review to a scholar profile, and add any featured images.
The full-length description for research topics, which appears at the top of research topic landing pages, is stored in the main content area of the Dashboard edit page. The “short” description, used in research topic teasers on the homepage and elsewhere on the site, is stored in the post excerpt.
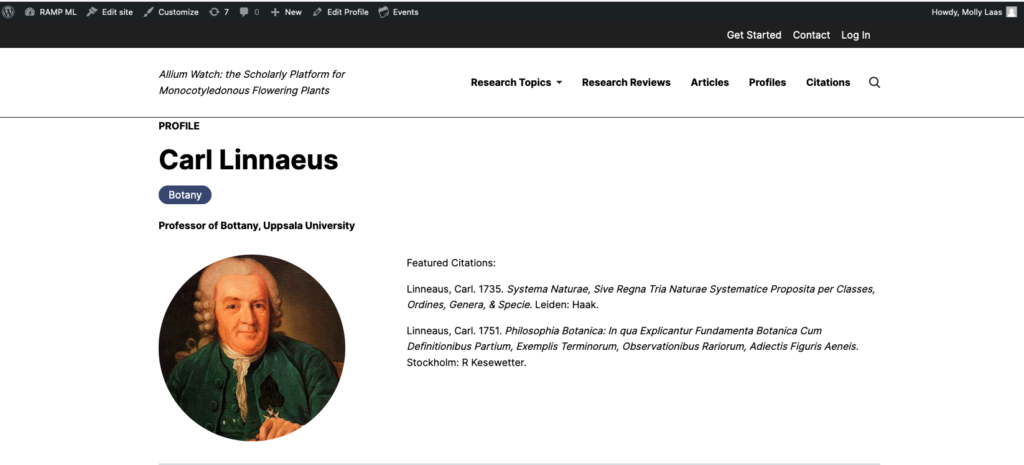
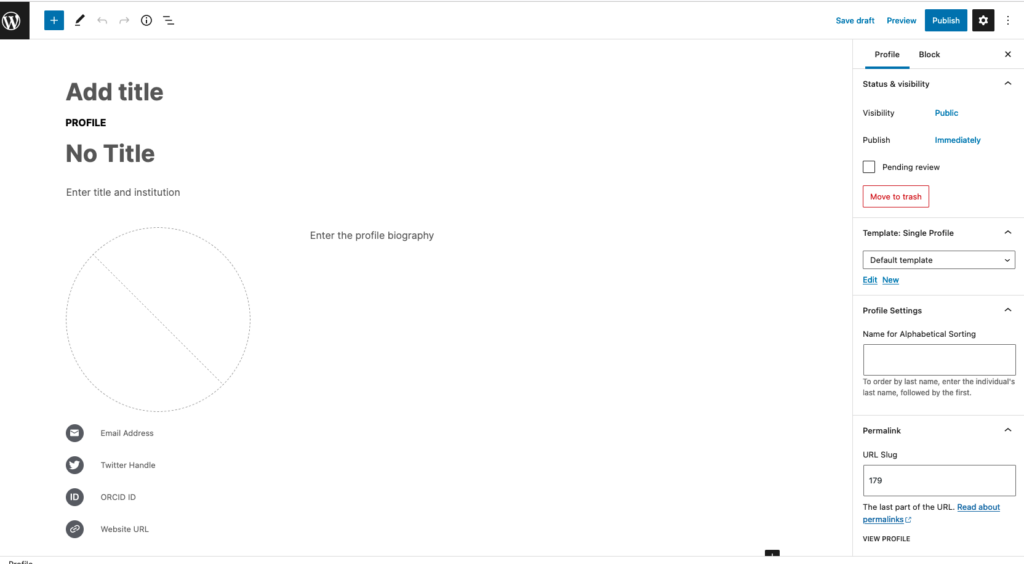
Profiles
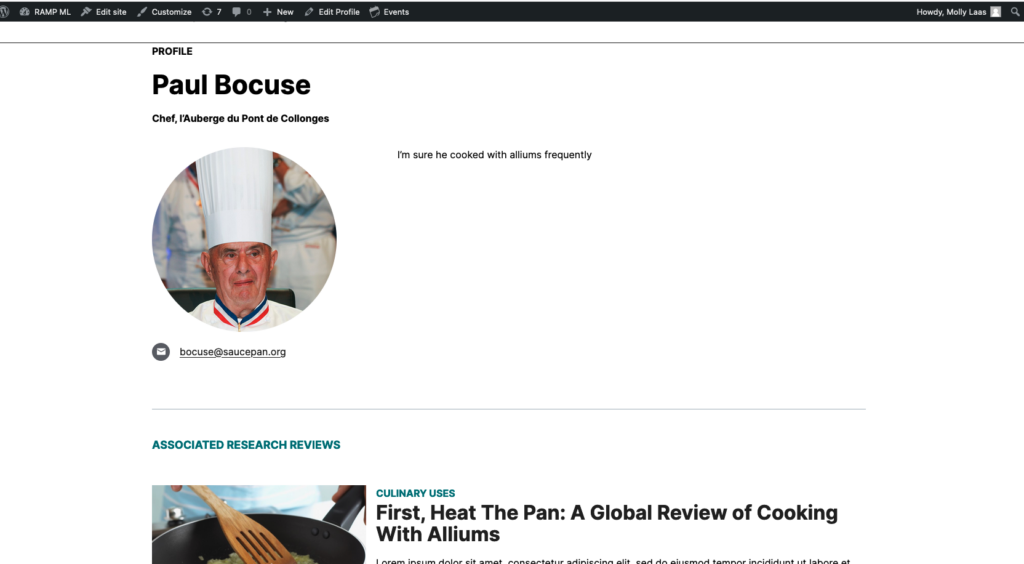
A profile needs to be set up for an author before an article or research review can be assigned to them. The standard template for profiles includes name, title and institution, photograph, biography, and contact information such as email addresses and Twitter handles. This information will only appear on the finished page if information is added in these sections.
The citations, article, and research reviews associated with the profile will appear on the scholar’s profile page.
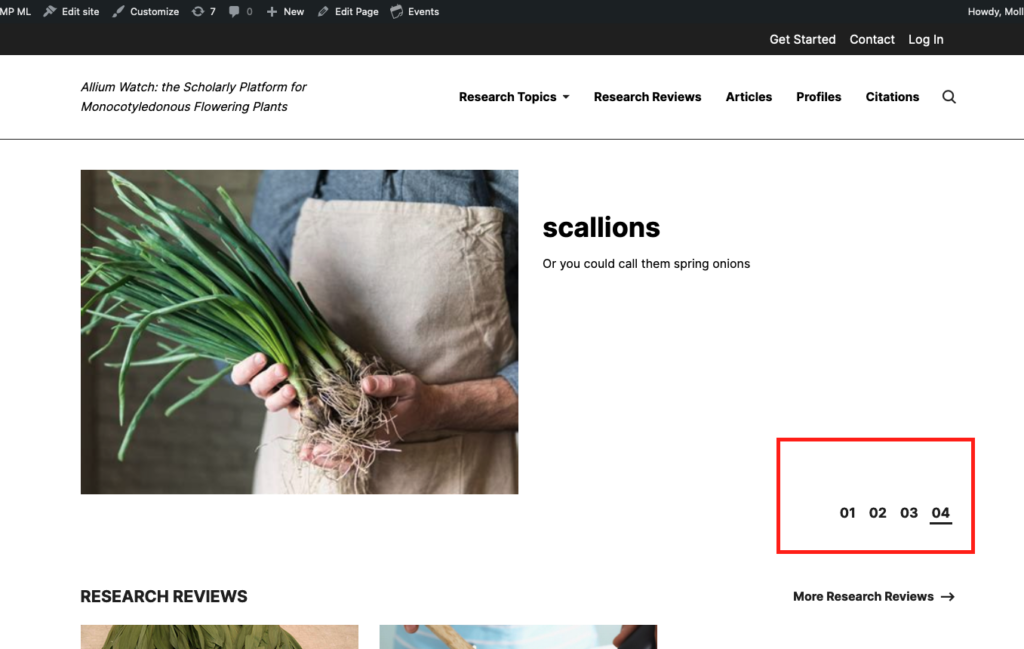
Homepage Slides
At the top of the Research AMP home page are a series of sliders that can allow you to highlight research topics or individual articles. The sliders can either be automatic, in which one slide moves to another at a set interval, or site users can manually click through the slides.
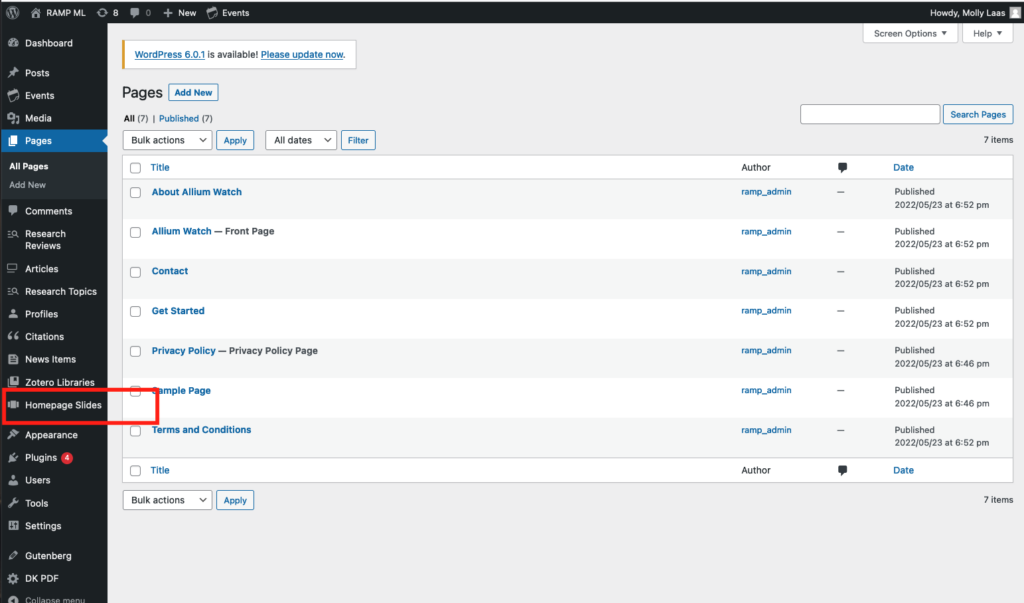
The homepage slides can be created and customized by clicking the “homepage slides” link in the left navigation bar (outlined in red in the image below)
Citations
Zotero is the repository of truth for all citation data. As such, all changes to data need to be made on the Zotero side, and changes would appear on the Research AMP site.
The citation pages populate from the Zotero Library. You’ll note that not all the possible information on the citation page: we decided that title, abstract, author, publication, and year were sufficient. We elected not to reproduce the information architecture, searching and filtering already available on the Zotero web client, opting to steer visitors there rather than reinvent the wheel.
If the author of a citation has a scholar profile, be sure to make the association on the right-hand column of the dashboard edit page. This information is used to populate the “recent citations” section of scholar profiles. It also powers the association of scholars with research topics: if a given citation is linked to one topic, then its associated scholars will appear when filtering by that topic in the search function.
Zotero libraries for Research AMP sites are publicly accessible, linked to your individual site, and edited only by group members. Building your Zotero library is critical to the function of a Research AMP site and to help build your site audience. See below for general guidelines on how to set-up a Zotero for your Research AMP and suggestions on citation practices.
Organizing your Zotero Library
We recommend two Zotero groups within your Research AMP library. One group will be private, members-only, and serve as the backend staging ground for editing citations before they go live. This allows for thoughtful curation and editing before citations are publicly available.
The second group will be public access and member-only editing. This will be where your RAMP citations’ live and what is linked to your Research AMP website’s “citation library.” Before citations are added to this group, they should be edited to reflect your citation style and linked properly to the URL where the work exists in an online journal, database, or so forth.
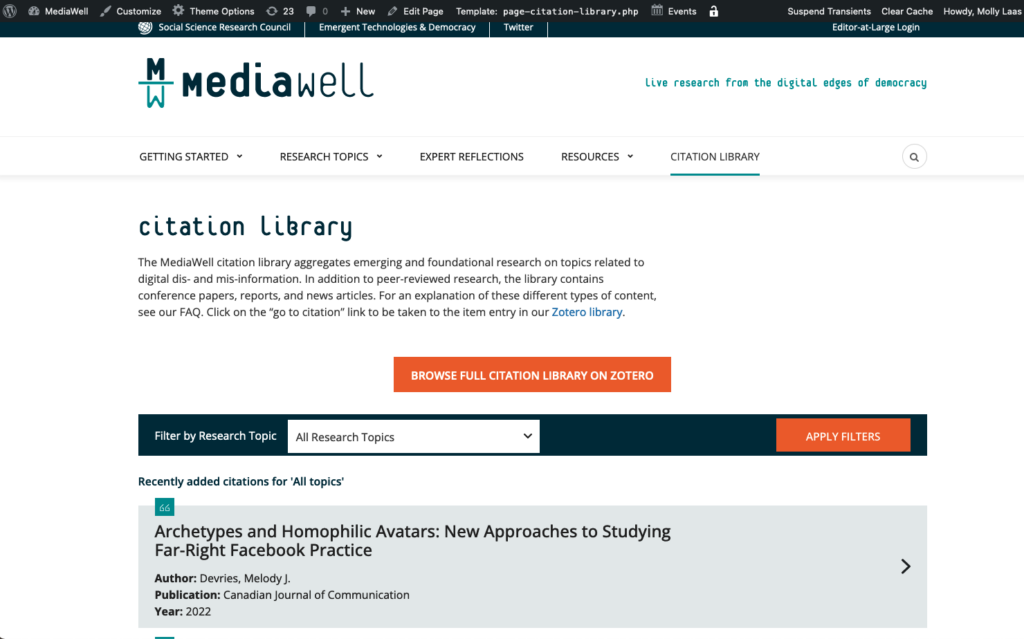
Within your public access Zotero group, we recommend setting sub-folders around each Research Topic you have. For example, see MediaWell’s citation library here. Note that the citation library seen in this link is filtered by Research Topic, meaning that citations can be searched for by Research Topic. These sub-folders are critical to how the site is designed to organize information for your audience across the platform. As such, citations should be organized into their appropriate sub-folder and not live “loosely” in the broader Zotero group.
The appropriate settings for your Zotero groups should be as follows:
- Private Group
- Group Type: Private
- Group Library: Only members can view and edit
- Public Group
- Group Type: Public, Closed Membership
- Group Library: Anyone can view, only members can edit
Please note that within your initial Research AMP download, Zotero will be automatically linked to your RAMP website by SSRC’s development team.
Styling Citations in Zotero
We try to be as comprehensive as possible with our citations while maintaining clarity for the average website user. As such, we recommend setting specific style guides for citations among your Research AMP team. We find that the best citation practices for us are generally as follows:
- Properly edited works should have:
- Item Type,
- Title,
- Authors,
- Volume & Issue if appropriate,
- Date: YEAR/MONTH/DAY format (or just year if NA),
- Full Abstract,
- Publication, and
- URL.
- We also recommend removing any tags that auto-populate with the citation as they cannot be sorted in the Research AMP website and can lead to discrepancy issues for a user.
- Once a citation is moved out of the private staging group into the public one, delete this citation from the staging zone for organizational best practices.
We do not recommend using pdfs as your main citation as Zotero cannot auto-populate any information. If you’d like to nominate an article or report in pdf form, make sure you are on the article webpage, not the online pdf view.
Research Reviews and Articles
The teaser that appears on the Research Topic landing pages is powered by the Excerpt. Be sure to fill in the excerpt field, or an excerpt will be generated automatically.
Each research review or article needs a “Formatted Citation” to power the “Cite This” tool. Enter it in the “Formatted Citation” metabox on the Dashboard edit screen. Be sure to click ‘Update’ to save changes.
Each research review or article needs a DOI to generate an AltMetrics badge. Enter it in the “DOI” metabox on the Dashboard edit screen. Be sure to click “Update” to save changes. Note that the use of AltMetrics is optional, and requires a subscription to AltMetric. DOIs also require registration via ResearchGate.
Featured images are used to generate images on the home page, associated with the article or research review. Use the “Featured Image” metabox near the bottom of the right-hand column on the Dashboard edit page. The image should be at least 1200px wide, high-contrast B&W.
When entering the review or article text into the WordPress editor, you will need to ensure that all formatting is correct in your text editing software before proceeding. Format the body text and all sub headings correctly, and add a works cited section.